
• Skip to primary navigation
  • Skip to main content
  • Skip to primary sidebar
One Happy Dish
  • About
  • Recipes for One
  • Dinner for One
  • Small Batch Baking
menu icon
go to homepage
  • About
  • Recipes for One
  • Dinner for One
  • Small Batch Baking
search icon
Homepage link
  • About
  • Recipes for One
  • Dinner for One
  • Small Batch Baking
×
Home » Recipes for One » Simple Sides

Roasted Cauliflower

by Allison Campbell · Last updated Mar 5, 2023 · This post may contain affiliate links · 1 Comment

5 from 2 ratings
Jump to Recipe

This delicious oven roasted cauliflower recipe is so versatile and so EASY! Meet your new favorite side dish.

Roasted cauliflower in a tan ceramic serving bowl on a brown wood table.

Oh how I love, love, love oven roasted cauliflower. It's so simple and hands off, and yet it comes out of the oven tasting like a fancy restaurant side. This crowd pleaser might even win over those hard to convert cauliflower eaters. 😉

This cauliflower side dish pairs well with pretty much everything from steak, chicken and salmon to any vegetarian main dish. I love pairing it with this pan seared salmon in place of the broccoli, or alongside this walnut and herb crusted chicken or marinated tempeh. If you'd like to try another classic oven roasted dish, you can't go wrong with these roasted Brussels sprouts or Parmesan crusted Brussels sprouts.

Jump to:
  • 🌿 Ingredients
  • 📝 Instructions
  • 📋 Substitutions
  • 📖 Variations
  • 🔪 Equipment
  • 🍱 Storage
  • 🎉 Top tip
  • 🍳 Recipe
Add this site as a preferred Google source!
Add

🌿 Ingredients

The ingredient list is super simple for this cauliflower side, and the fresher the cauliflower the better.

Roasted cauliflower ingredients on a brown wood table.

See recipe card below for exact quantities.

📝 Instructions

The only actual work in this recipe is all in the prep. To start, preheat the oven to 425°F and line a baking sheet with parchment paper (for super easy cleanup.)

Wash and trim the cauliflower, removing any green leaves, and cut the head first into quarters and then into medium-sized florets.

Quartered cauliflower head on a white cutting board with a green ceramic chef's knife.
Freshly chopped cauliflower florets in a glass food prep bowl on a brown wood table.

Next, melt a little butter, place the cauliflower florets in a large mixing bowl, and drizzle some olive oil and melted butter over them. Sprinkle everything with garlic powder, salt and pepper, mix well to combine, and pour out onto the prepared baking sheet.

Oiled and seasoned cauliflower florets on a parchment paper lined baking sheet.

And finally, place the baking sheet in the oven for about 20-25 minutes or the cauliflower just starts to turn golden brown, turning the florets once halfway through.

Top with extra salt and pepper to taste, and garnish with freshly chopped parsley if desired.

📋 Substitutions

As written, this roast cauliflower recipe is vegetarian and gluten free. Here are a couple of easy substitutions you can use in addition:

  • Vegan - substitute all olive oil for the butter
  • Garlic powder - feel free to use minced fresh garlic (equally delicious!) or just leave out altogether

📖 Variations

You can easily customize this recipe for any taste! Here are a few ideas:

  • Parmesan roasted cauliflower - add some freshly grated Parmesan cheese before roasting; it's one of my favorite add-ons 🙂
  • Curry roasted cauliflower - add a little of your favorite curry powder instead of garlic
  • Spicy roasted cauliflower - add a pinch of cayenne pepper or crushed red chili pepper flakes
  • Kid friendly - use a little less garlic or just leave out for little ones

🔪 Equipment

Here is the list of equipment I used in this recipe:

  • baking sheet
  • parchment paper (optional, for easy cleanup)
  • cutting board
  • chef's knife
  • large mixing bowl

🍱 Storage

Oven roasted cauliflower will stay fresh in an airtight container in the fridge for up to 4 days, or in the freezer for up to 2 months.

🎉 Top tip

Don't forget to melt the butter just before you drizzle it over the cauliflower with the olive oil, and make sure to mix really well so that all of the florets get coated for even roasting.

Enjoy!

🍳 Recipe
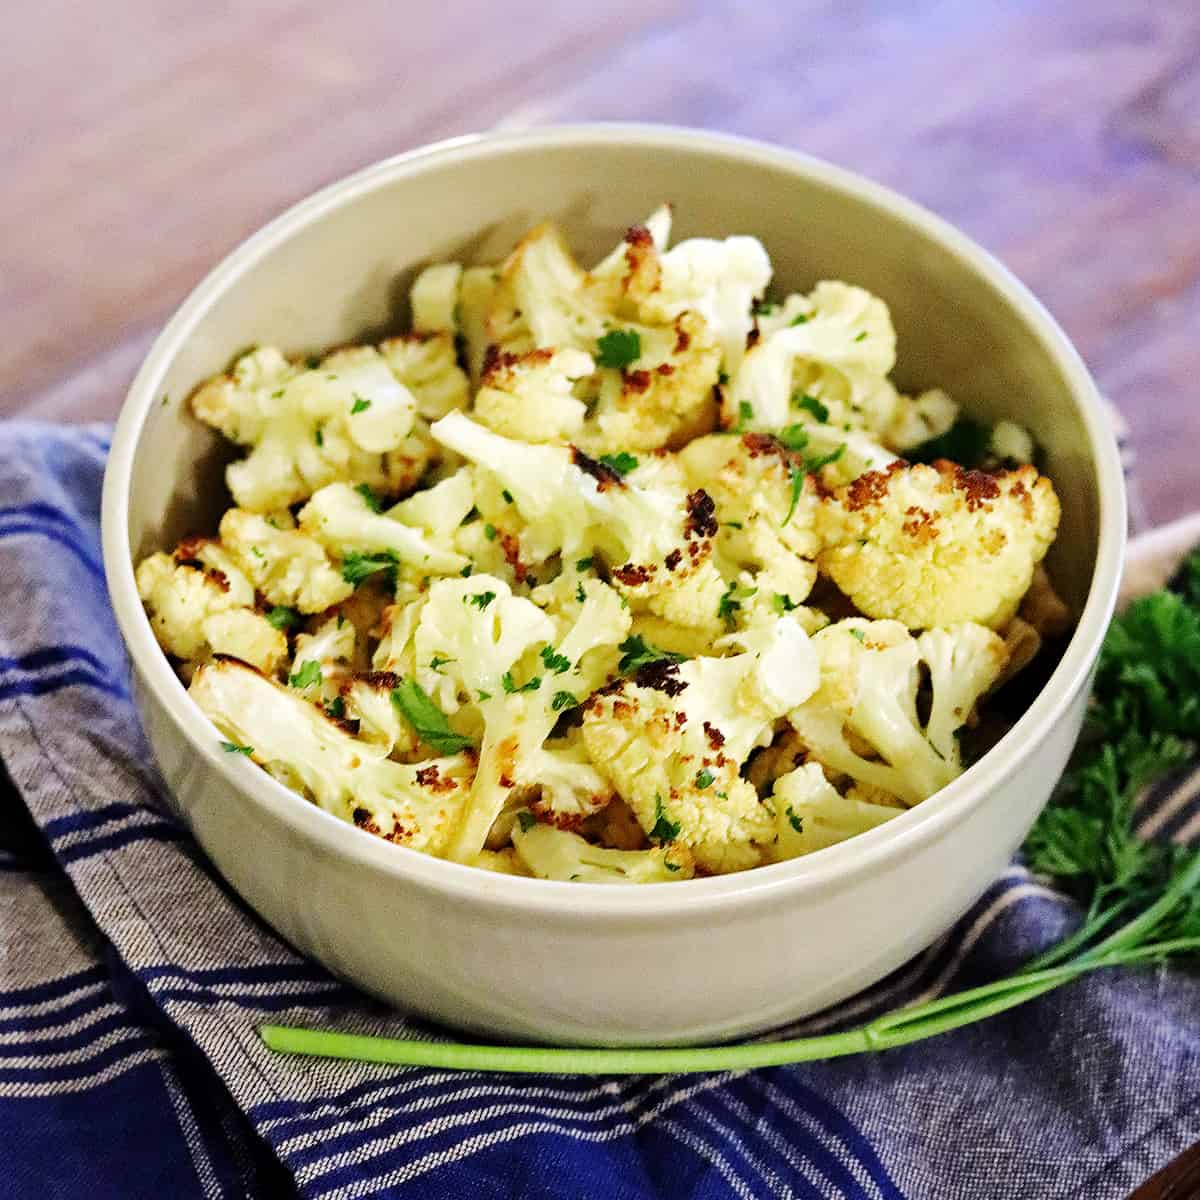
Roasted cauliflower in a tan ceramic serving bowl.

Roasted Cauliflower

Allison Campbell
5 from 2 ratings
Learn how to roast cauliflower in the oven with this delicious, easy recipe! The perfect simple side dish for special occasions or every day.
Save RecipeSaved! Print Recipe
Prep Time 10 minutes mins
Cook Time 25 minutes mins
Total Time 35 minutes mins
Servings: 6 servings
Course: Dinner
Cuisine: American
Calories: 79
Ingredients Equipment Method Nutrition Notes

Ingredients
  

  • 1 large head cauliflower
  • 2 tablespoons olive oil
  • 1 tablespoon butter melted, or olive oil for vegan
  • ½ teaspoon garlic powder
  • sea salt to taste
  • freshly ground black pepper to taste
  • chopped fresh parsley for garnish

Equipment

  • baking sheet
  • parchment paper optional, for easy cleanup
  • cutting board
  • chef's knife
  • large mixing bowl
Prevent your screen from going dark

Method
 

  1. Prep: Preheat the oven to 425°F and line a baking sheet with parchment paper for easy cleanup. Wash and trim the cauliflower, and cut into medium-sized florets.
  2. Combine: Place the cauliflower florets in a large mixing bowl, drizzle the oil and butter over them, and sprinkle everything with garlic powder, salt and pepper. Mix well to combine and pour out onto the prepared baking sheet.
  3. Roast: Place the baking sheet in the oven for 20-25 minutes or until golden brown, turning the florets once halfway through.
  4. Enjoy: Top with extra salt and pepper to taste, and garnish with freshly chopped parsley if desired. Serve immediately, and enjoy!
Nutrition

Calories: 79kcalCarbohydrates: 7gProtein: 3gFat: 5gSaturated Fat: 1gPolyunsaturated Fat: 1gMonounsaturated Fat: 3gCholesterol: 0.3mgSodium: 52mgPotassium: 429mgFiber: 3gSugar: 3gVitamin A: 60IUVitamin C: 68mgCalcium: 35mgIron: 1mg

Notes

Storage: Oven roasted cauliflower will stay fresh in an airtight container in the fridge for up to 4 days, or in the freezer for up to 2 months.

Did you make this recipe?

I'd absolutely love for you to leave a review!

More Fresh & Simple Sides

  • A white bowl filled with roasted sweet potato cubes sits on a white napkin next to a silver fork.
    Small Batch Oven Roasted Sweet Potatoes
  • A white bowl filled with cooked wild rice sits on a tan napkin with a dark blue plaid pattern.
    Small Batch Wild Rice (2 Servings)
  • Dill pickled deviled eggs on a white serving plate.
    Dill Pickle Deviled Eggs (Easy Small Batch Recipe)
  • Homemade cranberry sauce in a glass serving dish.
    Classic Cranberry Sauce
  • Facebook
  • X

Stay updated

Get new recipes via email.

Reader Interactions

Comments

  1. Katherina

    February 01, 2022 at 4:29 pm

    5 stars
    Thanks for sharing.

    Reply
5 from 2 votes (1 rating without comment)

Leave a Reply Cancel reply

Your email address will not be published. Required fields are marked *

Recipe Rating


Primary Sidebar

Headshot of Allison Campbell, food blogger at One Happy Dish.

Hi, I'm Allison! I share fresh, fun single-serve and small batch recipes (without the leftovers.) 🎉

More about me →

Banner with image of 3-ingredient peanut butter cookies.
A plate with four small slices of French toast sprinkled with powdered sugar, served with two orange wedges and a fork. Text above reads Single-Serve French Toast, and below: Get the recipe with an arrow.

Footer

↑ back to top

About this Food Blog

  • About

Policies

  • Accessibility Policy
  • Editorial Policy
  • Privacy Policy
  • Terms of Service

Contact Me

  • Contact

As an Amazon Associate I earn from qualifying purchases.
Copyright © 2026 One Happy Dish. All rights reserved.

Rate This Recipe

Your vote:


A rating is required
A name is required
An email is required

Recipe Ratings without Comment

Something went wrong. Please try again.