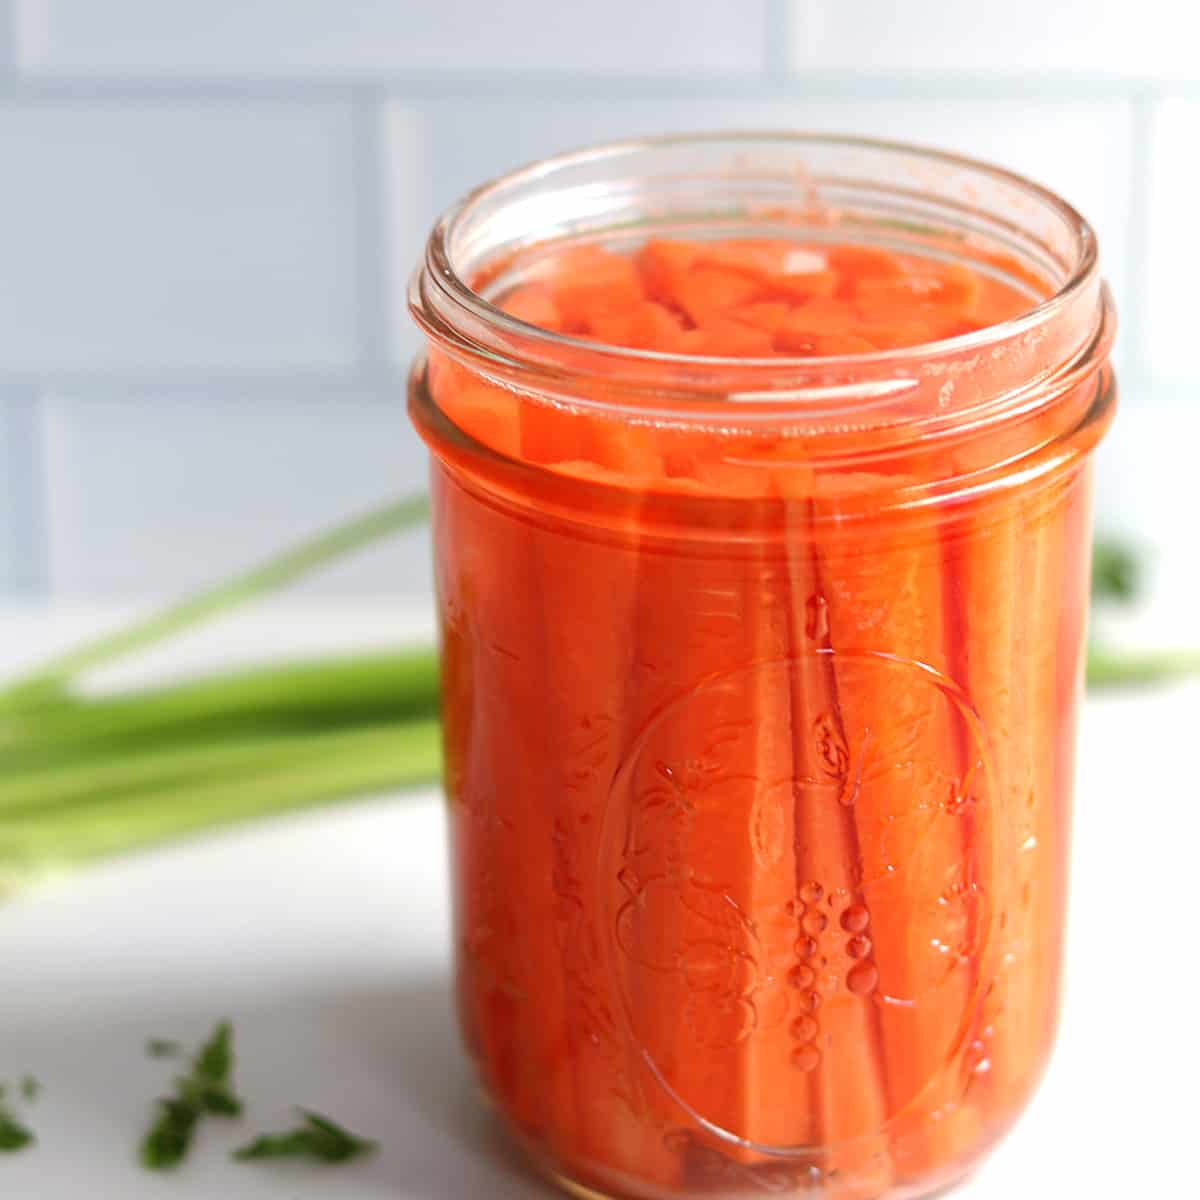
These crunchy fermented carrot sticks are SO delicious and super easy to make with just a few simple ingredients and ten minutes of prep time needed. (And trust me, the five days of fermentation time is so worth the wait.) 😉 If you've ever wanted to learn how to ferment carrots without making a huge batch, this recipe is for you.

I absolutely love making fermented carrots because they're one of the easiest fermented food recipes to make at home. They're crunchy, naturally sweet and savory, and totally forgiving if your slices aren't perfect (mine rarely are). And if you're cooking for one or just want to have a small jar on hand, this recipe is the perfect place to start.
Small batch fermentation is great because it also lets you experiment with different flavors; maybe garlic one week, ginger or dill the next. It's incredibly rewarding and fun to taste the final result and watch your ferment bubbling along in the meantime. And the process couldn't be easier: a quick salt brine, a little patience, and natural fermentation does the rest.
If you're new to fermentation, see my guide Fermentation 101: How to Ferment Vegetables before getting started.
🌿 Ingredients

You'll only need a half a clove of garlic at the most as a little goes a long way here, and I also like to add some mustard seed spice which really adds to the savoriness of this recipe. Not to worry if you don't have one of these, though; you can still make this recipe with just carrots and salt!
For salt, you can use sea salt, kosher salt or any other natural, finely ground salt. Just make sure it doesn't contain any anti-caking agents and is not iodized, as both can affect the success and/or taste of the ferment.
Also, make sure you're using filtered, non-chlorinated water when fermenting carrots or other vegetables.
Pro tip: If you don't have access to filtered water, you can boil tap water first and let it cool in order to remove the chlorine from the water.
See recipe card below for exact quantities.
⚙️ Equipment recommendation
Okay, let's talk tools. For most lacto-fermented vegetable recipes, the items you'll need are actually really simple.
A Mason jar (affiliate link) or other glass jar with a lid is the only real requirement. This is where your veggies will ferment at room temperature, and you can place the same jar in the fridge when they are ready (no need to transfer the carrots.)
If you'd like, you can buy special fermentation lids (affiliate link) that will help let carbon dioxide gas escape from your ferment. However, they are not essential and a regular loosely tightened lid will be fine to allow a small amount of gas to escape. You can also buy fermentation weights (affiliate link) to help keep veggies submerged under water during the fermentation process. As long as you pack your carrots tightly, though, you shouldn't need an additional weight.
You'll want to look for wide-mouth mason jars (as opposed to regular mouth mason jars.) The wider opening will allow for easier access as you place your vegetables in the jar to ferment. Also, it'll be much easier to grab them out for snacking later on. 🙂
In terms of size, pint sized Mason jars are ideal especially if you're just getting started fermenting. If you'd like to make a larger batch, just switch to a quart sized Mason jar and double the ingredients.
📝 Instructions


Salt ratio for fermented carrots
A quick side note here on salt and fermentation. Because we're using lacto-fermentation (or wild fermentation) here, we'll need to create an ideal environment so that the Lactobacillus (good) bacteria can grow and crowd out any bad bacteria. And that process is accomplished through a very specific salt ratio of 2-5%.
To learn more about the science behind lacto-fermentation and how the amount of salt in this recipe was determined, see my guide on how to ferment vegetables. But rest assured that you can feel confident using two teaspoons of sea salt for this recipe as written. This will ensure you're within the established salt ratio window in order to have predictable results with your ferment.
📖 Variations
The possibilities are endless when it comes to fermented vegetable recipes! Here are a few delicious variations you can try with carrots:
- Fermented ginger carrots - substitute the garlic with a little shaved or grated ginger for a delicious twist
- Fermented dill carrots - substitute the mustard seed for a few sprigs of fresh dill, with or without the garlic
- Fermented garlic carrots - as written, this recipe does call for half a clove of garlic, but feel free to add more if you'd like a stronger garlic flavor (just keep in mind that a little really does go a long way in a ferment)
You can also mix up the carrots themselves:
- Fermented baby carrots - feel free to use baby carrots (just make sure to wash before use); you'll probably want to use a fermentation weight unless you can pack them in your jar tightly enough
- Fermented shredded carrots - shred a bunch of carrots by hand or in a food processor, or use a mandoline to slice thinly and prepare the recipe as written (use a fermentation weight to keep the carrots submerged); I love these on a burger or some avocado toast
🥧 Serving suggestions
I absolutely love snacking on homemade fermented carrots any time of the day. They also make a great add-on to a lunch for one (my favorite pairing is with this tuna sauerkraut sandwich.)
If you love these carrot sticks and want to go further into the wonderful world of fermented foods, I highly recommend trying some homemade sauerkraut next. 🙂
💭 FAQ
Fermented carrots have a mild salty and savory taste and crunch similar to pickles but a bit sweeter due to the natural sweetness of the carrots.
The fermentation time required for carrots will vary depending on the specific salt ratio used and temperature of the room, but a good guideline is about five days, plus or minus a day or two.
You may see some cloudiness develop in your ferment and that's normal. It's also normal if a white film develops on the top of the water (called kahm yeast); simply skim it off if you see it. If you see mold or a strange appearance or odor, though, that's a sign that you should discard the ferment and start with a new batch.
Homemade fermented carrots should last up to at least one to two months in a covered jar in the fridge. You'll know that they are still fresh if they have a savory and pleasantly sour aroma.
🍳 Recipe
Small Batch Fermented Carrots (Crunchy & Savory)
Ingredients
Equipment
Method
- Wash, trim and peel the carrots. Peel the garlic. With clean hands, use a sharp knife to cut the carrots into sticks and half of the garlic clove into thin slivers.1 pound carrots, ½ clove garlic
- Place the garlic slivers and mustard seed in the Mason jar. Then, hold the jar on its side and pack the carrot sticks into it on their ends to fill it as tightly as possible, making sure they are all about equal height. The carrots should be about as high as the largest rim on the Mason jar. When it's full, see if you can fit a few more in so that none of them can move (this will help them stay submerged while they ferment without needing a weight.)½ teaspoon mustard seed
- Sprinkle the salt over the carrots, then slowly pour the water over everything until the carrots are completely submerged under the water, but leaving a little room at the top of the jar.2 teaspoons sea salt, 1 cup filtered water
- Close the jar loosely with lid and place in an area that's out of the direct sunlight at room temperature; on a countertop or in a cabinet is fine. Open the jar after 4-5 days and take a taste. If you prefer a stronger flavor, keep fermenting and test again in another day or two.
- Once you're happy with the taste, place the covered jar in the refrigerator to end the fermentation process, and enjoy!
Nutrition
Video
Notes
Did you make this recipe?
I'd absolutely love for you to leave a review!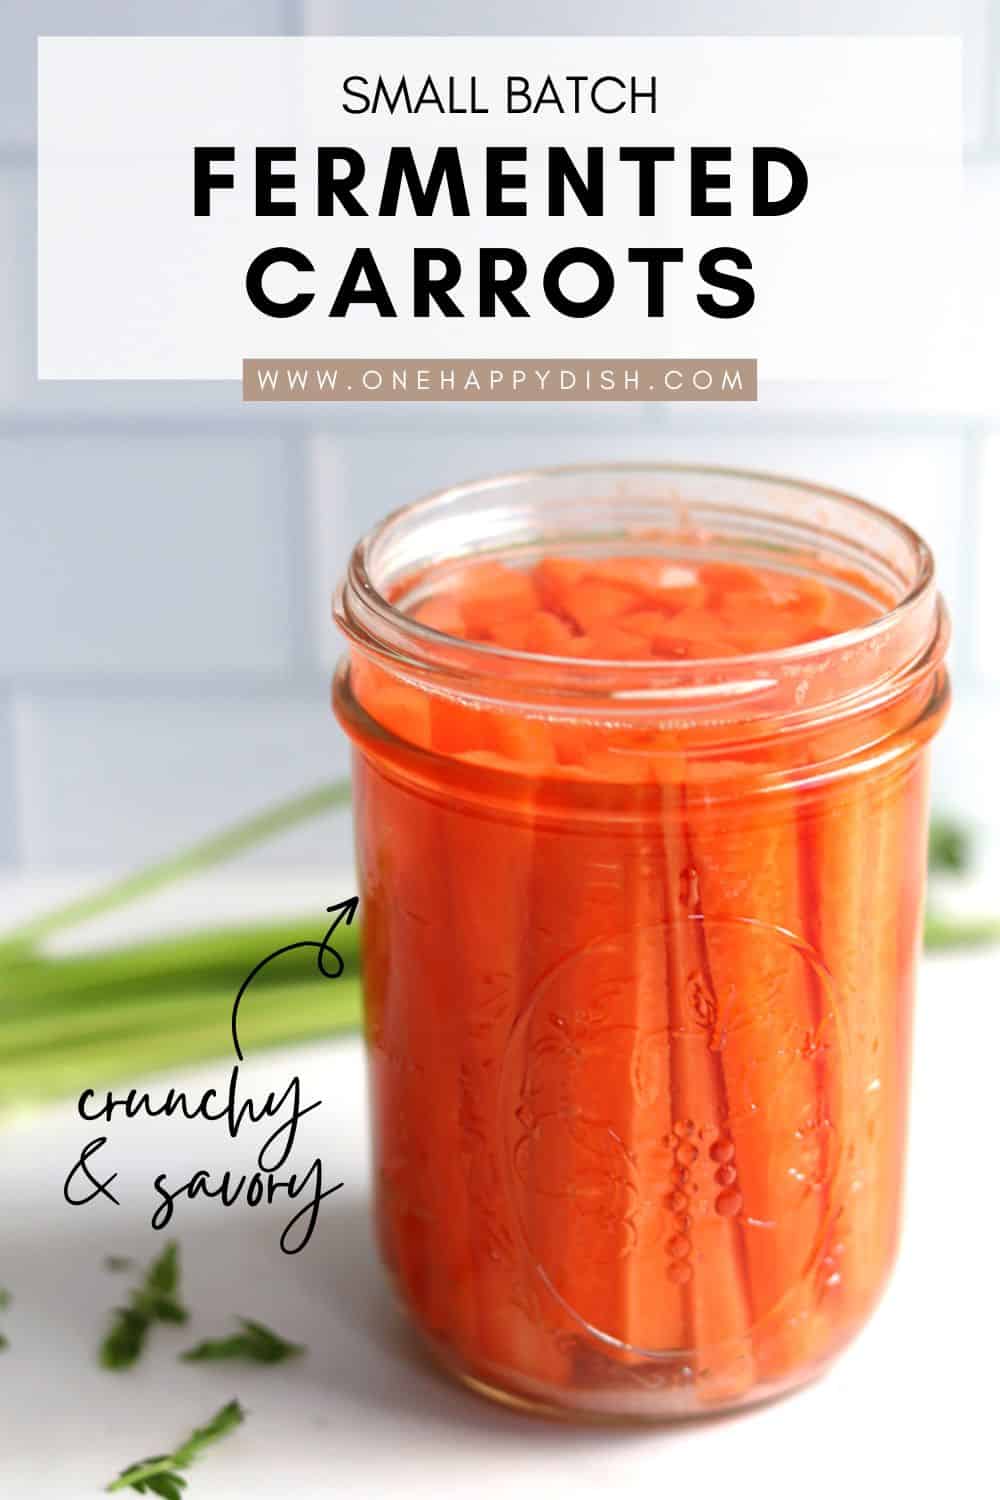


Leave a Reply